
Knowing how to sew a button is one of the most useful and practical sewing skills anyone can learn. Whether you’ve lost a button on your favorite shirt or need to reinforce one that’s about to fall off, sewing it back on quickly saves you time and money. Plus, it’s a simple task that can be done with just a needle, thread, and a few minutes.
Step-by-Step Guide on How to Sew a Button
If you want to master how to sew a button, it’s important to follow a clear and easy process. At ClothingDigest.com, we recommend starting with gathering the right materials: a needle, matching thread, scissors, and the button you need to attach. Thread the needle and knot the end to prepare for sewing.
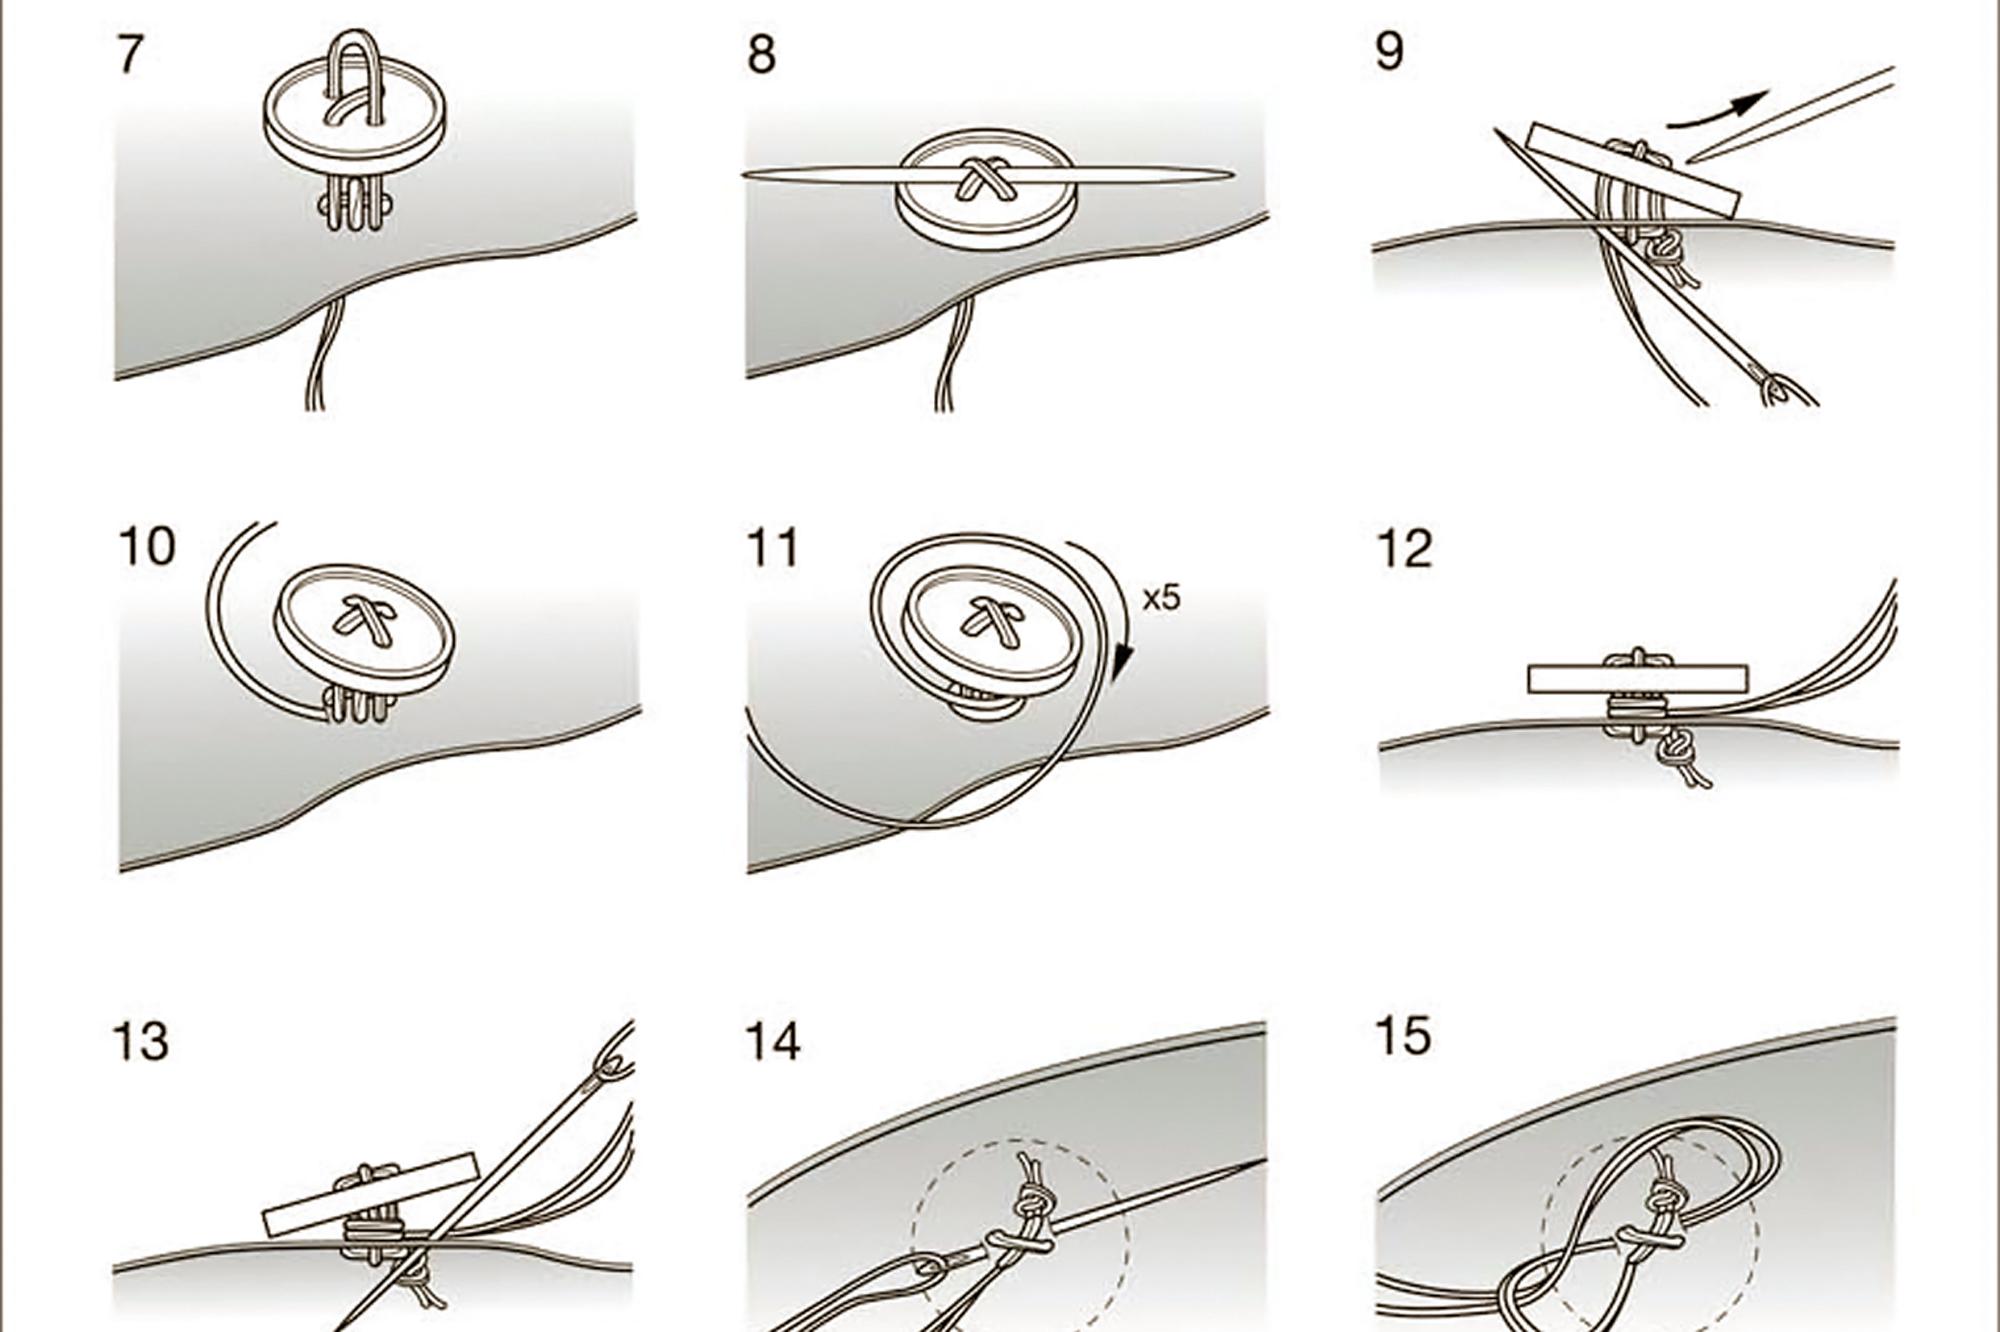
Begin by positioning the button over the fabric where the original button was placed. Insert the needle from the back of the fabric to the front, passing through one of the buttonholes. Then, sew through the opposite buttonhole, pulling the thread tight but not too tight to avoid puckering. Repeat this several times to secure the button firmly.
If the button has four holes, sew diagonally between the pairs of holes for extra stability. Once the button feels secure, bring the needle to the backside of the fabric and tie a small knot to fasten the thread. Trim any excess thread.
Why Learning How to Sew a Button Is Valuable
Sewing a button is more than just fixing clothes—it’s a skill that promotes self-reliance and sustainability by extending the life of your garments. It’s quick, easy, and can prevent the need to replace clothes prematurely. With a little practice, sewing buttons becomes a seamless part of your wardrobe maintenance routine.
Mastering this skill empowers you to tackle small repairs confidently and keeps your favorite pieces looking great for longer.