
Aluminum foil tape is a versatile tool for sealing, insulation, and repair—used widely in HVAC ducts, home insulation, automotive wiring, and even solar panel installations. Its effectiveness, however, depends entirely on correct application; poor technique leads to peeling, leaks, or reduced durability. Below is a step-by-step guide to applying aluminum foil tape properly, plus tips to ensure long-lasting results for both DIY and professional projects.
1. Pre-Application Preparation: Lay the Groundwork for Adhesion
Proper prep prevents 80% of common application issues, as aluminum foil tape relies on clean, dry surfaces to bond.
Step 1: Gather the Right Tools
You’ll need just a few items to ensure precision:
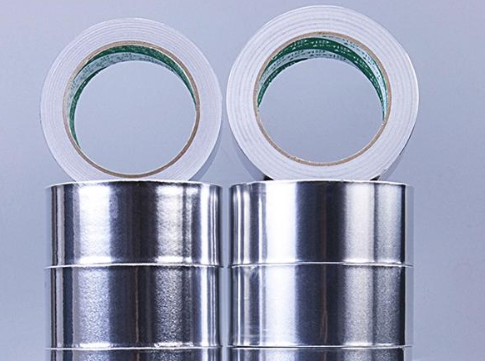
- Aluminum foil tape: Choose the right type for your project (e.g., HVAC-grade for ductwork, food-grade for kitchen repairs, industrial-grade for heavy-duty sealing).
- Cleaning supplies: A dry lint-free cloth (for dust) and isopropyl alcohol (for oil, grease, or residue—avoid water, which leaves moisture).
- Application tool: A plastic squeegee, roller, or even a credit card (to press the tape firmly; avoid metal tools that can scratch the foil).
- Cutting tool: A utility knife or tape dispenser (for straight, clean cuts—scissors may leave uneven edges).
Step 2: Prep the Surface
The surface must be clean, dry, and smooth—any debris or moisture breaks the adhesive bond:
- Wipe away dust, dirt, or loose particles with the dry cloth first.
- For oily or greasy surfaces (e.g., HVAC ducts, automotive parts), dampen the cloth with isopropyl alcohol, wipe the area, and let it dry completely (1–2 minutes).
- Fix uneven surfaces: Fill small gaps with caulk (for ducts) or sand down rough spots—tape can’t seal gaps it can’t adhere to.
2. Step-by-Step Application: Ensure Tight, Even Sealing
Follow these steps to apply the tape without bubbles, wrinkles, or gaps—critical for long-lasting sealing.
Step 1: Measure and Cut the Tape
- Measure the length of the area to seal, then add 1–2 cm extra (to overlap and avoid shortfalls).
- Cut the tape with your tool—keep the edge straight. If using a dispenser, pull the tape taut as you cut to prevent fraying.
Step 2: Apply the Tape Gradually
- Peel 2–3 cm of the backing paper off the tape (don’t remove all at once—this avoids tangles).
- Align the exposed adhesive edge with the start of the sealing area, pressing firmly with your finger to hold it in place.
- Slowly peel more backing paper as you smooth the tape along the surface, moving in one direction (e.g., left to right for ducts). Use your squeegee/roller to press the tape every 5 cm—apply even pressure to eliminate air bubbles (bubbles trap moisture and cause peeling).
Step 3: Seal Edges and Overlaps
- For joints or gaps (e.g., duct connections), overlap the tape by 2–3 cm at the ends—this creates a double seal.
- Press the edges of the tape firmly with the squeegee, focusing on the perimeter—edges are the most likely spot for peeling.
- If sealing curved surfaces (e.g., pipes), stretch the tape slightly as you apply it (don’t overstretch, which weakens the adhesive) to follow the curve.
3. Post-Application Checks: Avoid Common Mistakes
Even small oversights can ruin a seal—do these quick checks to ensure durability:
- Inspect for bubbles: Run your finger over the tape; if you feel a bubble, pierce it with a pin and press the area flat with the squeegee.
- Test adhesion: Gently pull the edge of the tape—if it lifts, re-press the area with more pressure or reapply (remove the old tape first if the adhesive is already compromised).
- Consider environmental factors: For outdoor or high-temperature areas (e.g., solar panels, engine bays), let the tape cure for 24 hours before exposing it to extreme conditions—this lets the adhesive set fully.
4. Project-Specific Tips for Better Results
Different uses need slight adjustments to maximize sealing performance:
- HVAC ducts: Use HVAC-grade aluminum foil tape (it resists temperature changes). Seal both the inside and outside of duct joints for extra protection against air leaks.
- Home insulation: Apply tape over insulation seams (e.g., fiberglass batts) to prevent heat loss. Avoid applying tape to damp insulation—dry it first to prevent mold.
- Automotive wiring: Wrap tape around wiring harnesses tightly, overlapping by 50% (half the tape’s width) to create a water-resistant barrier.
Conclusion
Applying aluminum foil tape correctly boils down to prep, precision, and pressure. By cleaning the surface thoroughly, applying the tape gradually, and sealing edges tightly, you’ll create a long-lasting seal that resists leaks, heat, and moisture. Whether you’re repairing ducts, insulating your home, or fixing automotive parts, following these steps ensures your aluminum foil tape does its job—no rework needed.