
If you’ve ever tried preparing embroidery files for Janome machines, you’ve likely come across the need for Image to JAN File Conversion. This process takes your regular designs—whether they’re JPG, PNG, or even hand-drawn sketches—and converts them into the JAN format that Janome embroidery machines can read. For hobbyists, crafters, and small businesses, mastering this process is essential to creating clean and precise stitch-outs. Luckily, with the rise of online tools and professional services, converting images into JAN files has never been easier or more accurate.
What is JAN File Format?
Before diving into the conversion process, it’s important to understand what a JAN file actually is. JAN is a proprietary embroidery file format created specifically for Janome embroidery machines. It contains detailed instructions for stitching, including:
- Stitch placement and sequence
- Thread colors and order
- Density and length of each stitch
- Special effects (like fills or satin stitches)
Without this conversion, your embroidery machine won’t be able to interpret the design correctly, leading to broken patterns, misaligned stitching, or poor-quality results.
Why Convert Images to JAN Files?
Not all embroidery machines speak the same “language.” While Brother machines prefer PES, Barudan uses DST, and Tajima has its own formats, Janome relies heavily on JAN. That’s why converting your designs is non-negotiable if you want them to work seamlessly.
Here are some key benefits of converting your images to JAN:
- Accuracy – Ensures your design stitches exactly as planned.
- Compatibility – Works across different Janome machine models.
- Customization – Allows you to adjust stitch density, size, and thread colors.
- Efficiency – Saves time compared to trial-and-error stitching.
Methods for Image to JAN File Conversion
There are several ways to handle this process, depending on your experience level, budget, and needs.
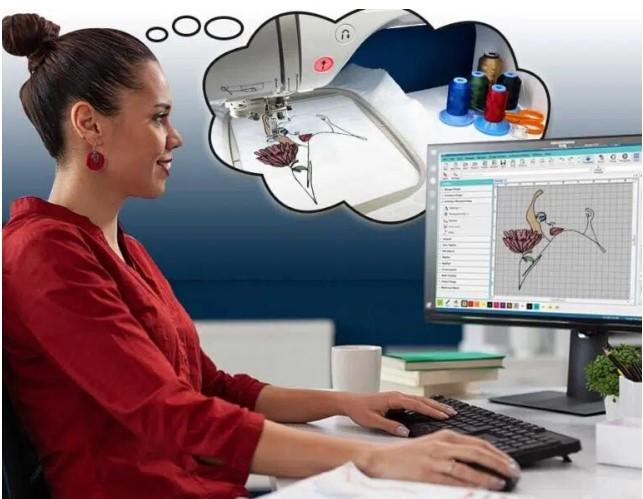
1. Using Embroidery Software
Professional software such as Janome’s Digitizer or Hatch can handle conversion. These programs let you import images, trace outlines, and assign stitches before exporting them as JAN files.
Pros: Full customization and advanced features.
Cons: Expensive and requires a learning curve.
2. Online Conversion Tools
Many online platforms now provide fast Image to JAN File Conversion. You simply upload your image, make adjustments, and download the JAN file.
Pros: Quick, easy, and affordable.
Cons: Limited editing compared to full software.
3. Hiring Professional Digitizing Services
If accuracy is your top priority, working with professional digitizers ensures the highest quality. Experts not only convert your images but also optimize stitch paths for flawless results.
Pros: Guaranteed precision and professional finish.
Cons: May involve turnaround time and service cost.
Steps to Convert an Image into JAN File
Here’s a simplified breakdown of the process:
- Choose Your Image – High-resolution images work best for digitizing.
- Import into Software or Online Tool – Load the file into your chosen program.
- Trace Outlines – Define the shapes, text, or details you want stitched.
- Assign Stitches – Choose between satin, fill, or run stitches depending on the design.
- Adjust Colors and Density – Match your thread chart to avoid mismatched tones.
- Save as JAN File – Export the final design in JAN format ready for your Janome machine.
Common Mistakes to Avoid in JAN Conversion
- Using Low-Quality Images – Blurry or pixelated images won’t digitize well.
- Skipping Manual Adjustments – Automatic conversions often need tweaking for stitch density.
- Overcomplicated Designs – Too many details can make embroidery messy.
- Not Testing the File – Always run a test stitch-out before large-scale production.
Tips for Better Conversion Results
- Stick to simple, bold images for cleaner embroidery.
- Use vector artwork if possible—it digitizes better than raster images.
- Pay attention to stitch direction, which impacts fabric pull.
- Consider resizing your image to fit the hoop size before conversion.
Who Needs Image to JAN File Conversion?
This process is essential for a variety of users, such as:
- Home crafters creating personalized embroidery projects.
- Small businesses offering customized apparel and accessories.
- Promotional companies needing logos on uniforms and merchandise.
- Professional designers who want complete control over stitch qualit.
The Future of JAN File Conversion
With technology advancing, we’re seeing smarter software and AI-based tools that make digitizing faster and more accessible. Soon, we might have mobile apps that can handle professional-grade JAN conversion directly from a smartphone or tablet.
Final Thoughts
Getting your designs ready for Janome machines doesn’t have to be complicated. By understanding the Image to JAN File Conversion process and using the right tools or services, you can ensure accurate, clean, and professional embroidery results every time. Whether you’re a hobbyist experimenting with designs or a business producing custom merchandise, the key lies in precision and reliability.
For embroidery enthusiasts who want expert help, Digitizing Buddy provides professional JAN file conversion and digitizing services, ensuring that every design translates into perfect stitch files for your projects.